Ultrasonic Testing in NDT- Introduction
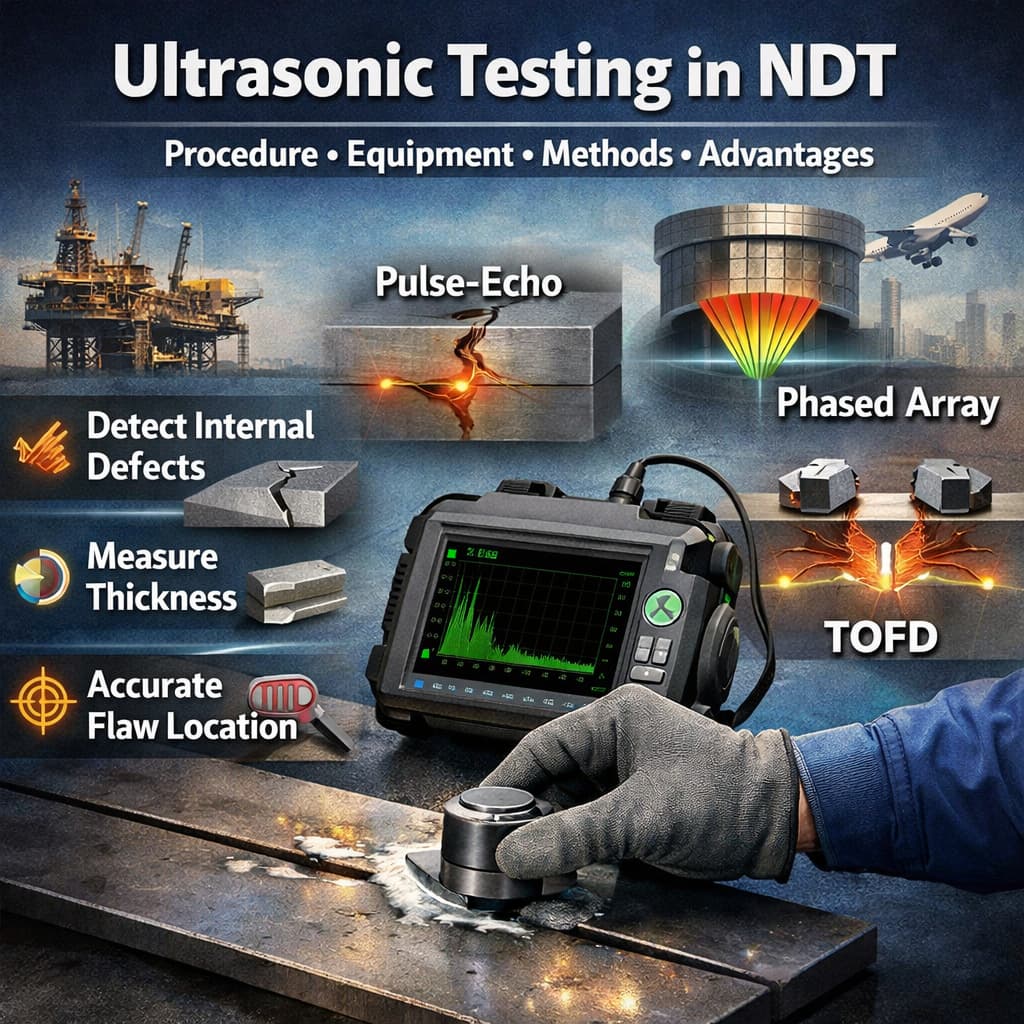
Non-Destructive Testing (NDT) is critical to a variety of industries such as manufacturing or construction or aerospace or oil & gas for verifying the integrity of materials. NDT can be used to identify internal defects or flaws in a material without damaging or altering that item’s asset integrity. Of the available NDT techniques, Ultrasonic Testing has become the preferred method of NDT because of the level of confidence the user has in UT to meet their NDT needs. Ultrasonic Testing uses high-frequency sound waves to detect internal defect locations within a component by measuring the thickness of the component and determining the time that it takes for sound waves to travel through a uniform solid material. The UT technique can be applied to various materials such as metals, plastics, composites, and ceramics.
UT Working Principle
When sound travels through space and reflects back reflects off an object it hits, this is what the Ultrasonic Test relies on. If I shoot sound waves into a metal with an ultrasonic probe, and the sound wave is reflected when it reaches the far side of the piece, or if it hits a crack or defect within the material the far side is defined as the farthest surface from the probe, the probe will detect that echo the reflected wave, and the probe will send that echo signal to the ultrasonic tester, which will analyze the signal and display the results on the screen.
That boundary could be one of the following:

- The back side (far side) of the material being tested
- A crack or other internal defect
- A change in density or structure of the material
After measuring the time between the echo being received and when it was transmitted from the probe, the inspector will be able to determine the size and location of any defects within the metal. This method of inspection is called non-invasive, in that the inspector can inspect the internals of the metal without cutting into or damaging the metal.
UT Procedure Step by Step
-
Clean the Surface
The first step is to clean the surface thoroughly. Any debris such as dust, oil, rust, or an irregular surface can affect the transmission of sound waves. Therefore, the surface must be clean and level to improve the accuracy of the inspection.
-
Apply Couplant
A couplant is put between the transducer and the test material. The purpose of the couplant is to eliminate the air gap between the probe and the material surface, thereby allowing ultrasonic waves to transmit from the transducer to the material surface most effectively.
-
Calibrate the Instrument
Before starting the inspection, the ultrasonic instrument must be calibrated using standard reference blocks. This calibration will ensure that the instrument will accurately measure the distance to an internal reflection as well as accurately size any detected discontinuity.
-
Position the Transducer
The transducer is placed in contact with the surface of the material being inspected. The ultrasonic waves are generated and transmitted into and through the material.
-
Transmit Ultrasonic Waves
As the transducer sends ultrasonic waves into the material, the waves will travel through the material until they encounter a boundary and/or a discontinuity (defect).
-
The Reflection of Sound Waves is Detected
If sound waves hit an object such as a crack, void or inclusion, some of the sound waves reflect back to the transducer. The device records the reflected signal.
-
Signal Analysis
The instrument interprets signals and shows them on a screen. The inspector can use the signal information to help identify and locate the size of any defects.
-
Documentation
The inspection and resulting data is documented in an inspection report that contains information about the location of the defect, approximate size, and suggested next steps if required.
Types of Ultrasonic Testing Methods
-
Pulse-Echo Technique
Pulse-echo technique is the most common ultrasound testing technique. This technique uses one ultrasound transducer to transmit and receive sound waves. The sound wave is transmitted into the test material and reflected back when the sound wave hits a boundary or defect.
-
Through-transmission Technique
Through-transmission ultrasound testing requires two transducers, one transmitting sound waves through the test material and the other receiving them on the opposite side. A defect in the test material will cause a weak or no received signal from the transmitter. The weak or missing received signal indicates a defect.
-
Phased Array UT
Phased Array UT uses multiple separate ultrasonic elements that can be electronically controlled to change the direction and focus of the sound beam. Phased Array UT is commonly used for pipelines, welding, and aerospace.
-
Time of Flight Diffraction (TOFD)
TOFD is an advanced technique for the ultrasound examination of welded joints. It uses the diffracted sound produced from the end of a crack to determine the size of the defect. This testing method has an excellent level of accuracy and a high level of precision in defect measurement.
UT Equipment
-
Ultrasonic Flaw Detector
Ultrasonic flaw detectors represent the primary instrument used in ultrasonic testing. The ultrasonic flaw detector generates a series of ultrasonic pulses and receives reflected signals from the inspected materials or objects. These reflected signals from the inspected item will then be displayed for analysis purposes.
-
Transducer
The transducer is responsible for converting electrical energy into ultrasonic sound waves (and vice versa). Based on the inspection being performed, there are different types of probes or transducers that can be used, such as:
- Straight Beam Probes
- Angle Beam Probes
- Dual Element Probes
-
Couplant
The couplant is a liquid or gel that is placed between the probe and the surface of the part being inspected. The purpose of the couplant is to assist in the effective transmission of ultrasonic waves into the part material.
-
Calibration Blocks
Calibration blocks are materials that have specific known dimensions and defects; calibration blocks are utilized to calibrate the UT equipment before testing.
-
Display System & Recording System
The flaw detector includes a display screen that shows waveforms and signals; in some advanced systems, the equipment also has the capability to store inspection information for later review.
Advantages of Using Ultrasonic Testing
- Utilizing Ultrasonic Testing in NDT can detect tiny internal defects, such as cracks or voids, that cannot be detected on the surface of an object/good.
- With Ultrasonic Testing you can view deep into the material providing an effective way to evaluate materials or components that are thick.
- When using Ultrasonic Testing, you will be able to determine the size and location of internal defects within a material/good very accurately.
Conclusion
Ultrasonic Testing is one of the most commonly employed non-destructive test methods to assess the internal integrity of a material using high-frequency sound waves and to find defects without damaging the material. In order to complete an inspection using UT, the inspector will prepare the surface of the part to be inspected, calibrate the testing equipment, transmit sound waves into the part being inspected, and analyze any reflected signals. Multiple methods of UT exist, including Pulse-Echo, Through Transmission, Phased Array, and TOFD
Frequently Asked Questions (FAQ)
- What is Ultrasonic Testing Used For?
Ultrasonic Testing is primarily used to determine the internal condition of a part, to assess the thickness (detection) of any material, and also evaluate the structural integrity of a component such as a weld, pipe, pressure vessel, or aircraft component.
- Which Materials Can Be Tested with UT?
Ultrasonic Testing can be performed on many different types of materials including:, metals, plastics, composites, ceramics, and glass. For Ultrasonic Testing to perform correctly, the material must transmit sound waves.
- Is Ultrasonic Testing Safe?
Ultrasonics is considered very safe. Sound does not produce a thermal effect and is non-ionizing (does not affect the operator’s health). When Ultrasonic Testing is done properly, it poses virtually no health risk to the operator.
Reference Websites & Articles
- American Society for Nondestructive Testing (ASNT)
https://www.asnt.org
Article: https://www.asnt.org/What-is-NDT/Ultrasonic-Testing - Olympus IMS – Ultrasonic Testing Overview
https://www.olympus-ims.com/en/ndt-tutorials/ut/ - TWI Global – Ultrasonic Testing (UT)
https://www.twi-global.com/technical-knowledge/faqs/what-is-ultrasonic-testing - NDT Resource Center (Iowa State University)
https://www.nde-ed.org/NDETechniques/Ultrasonics/ - Inspectioneering – Ultrasonic Testing Basics
https://inspectioneering.com/tag/ultrasonic+testing - Zetec – Ultrasonic Testing Technology
https://www.zetec.com/blog/what-is-ultrasonic-testing/ - ScienceDirect – Ultrasonic Testing Research Articles
https://www.sciencedirect.com/topics/engineering/ultrasonic-testing